How to Use Icons Inside Tabs
Enhance your tab navigation by adding icons alongside text labels. Icons can help users quickly identify content and improve the visual appeal of your tabs.
Prerequisites
Easy Tabs Block is installed and activated. The Icon Block plugin by WordPress.org is installed (free) for icon support.
Adding an Icon Step-by-Step Guide
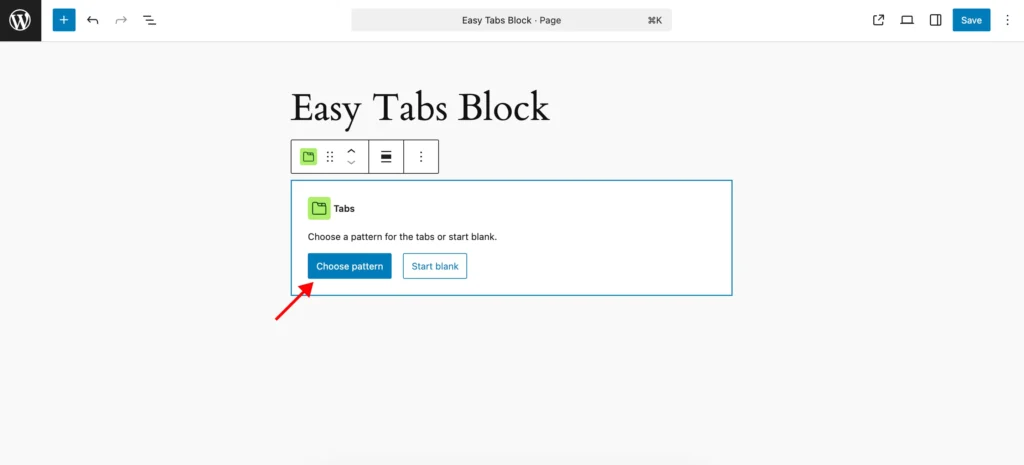
Insert the Tabs Block
In the Gutenberg editor, click on the Add Block (➕) button and search for “Tabs.” Then select the Easy Tabs Block to insert a tab container into your page or post.
Add or Edit a Tab Button
Within the Tabs block, locate the tab button you want to modify. Click on the label to open the toolbar and access the block settings for editing.
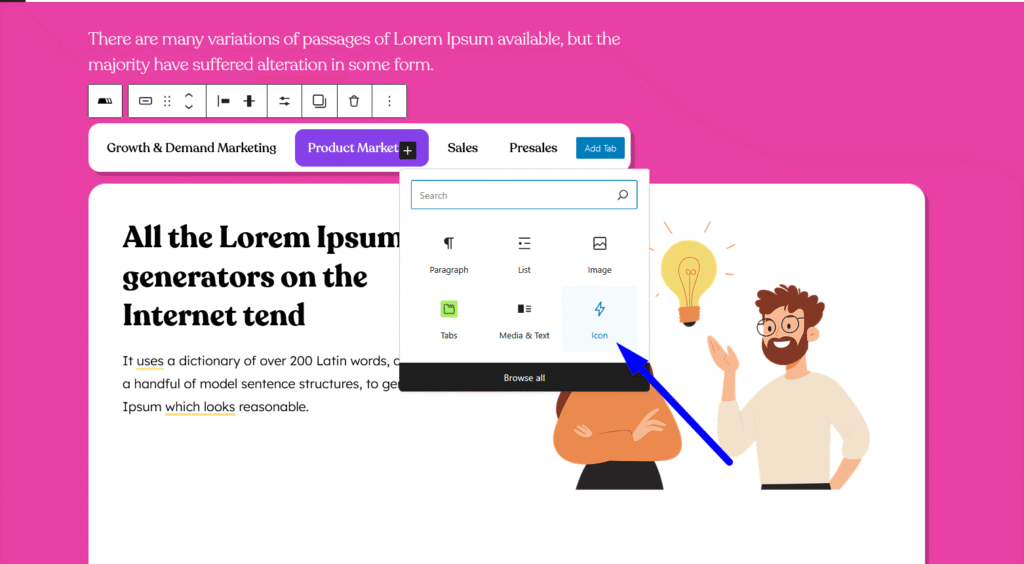
Insert an Icon Block
With the Tab Button selected, click the Add Block inserter inside the button area. Then, search for the Icon block from the Icon Block plugin and insert it to add an icon to your tab.
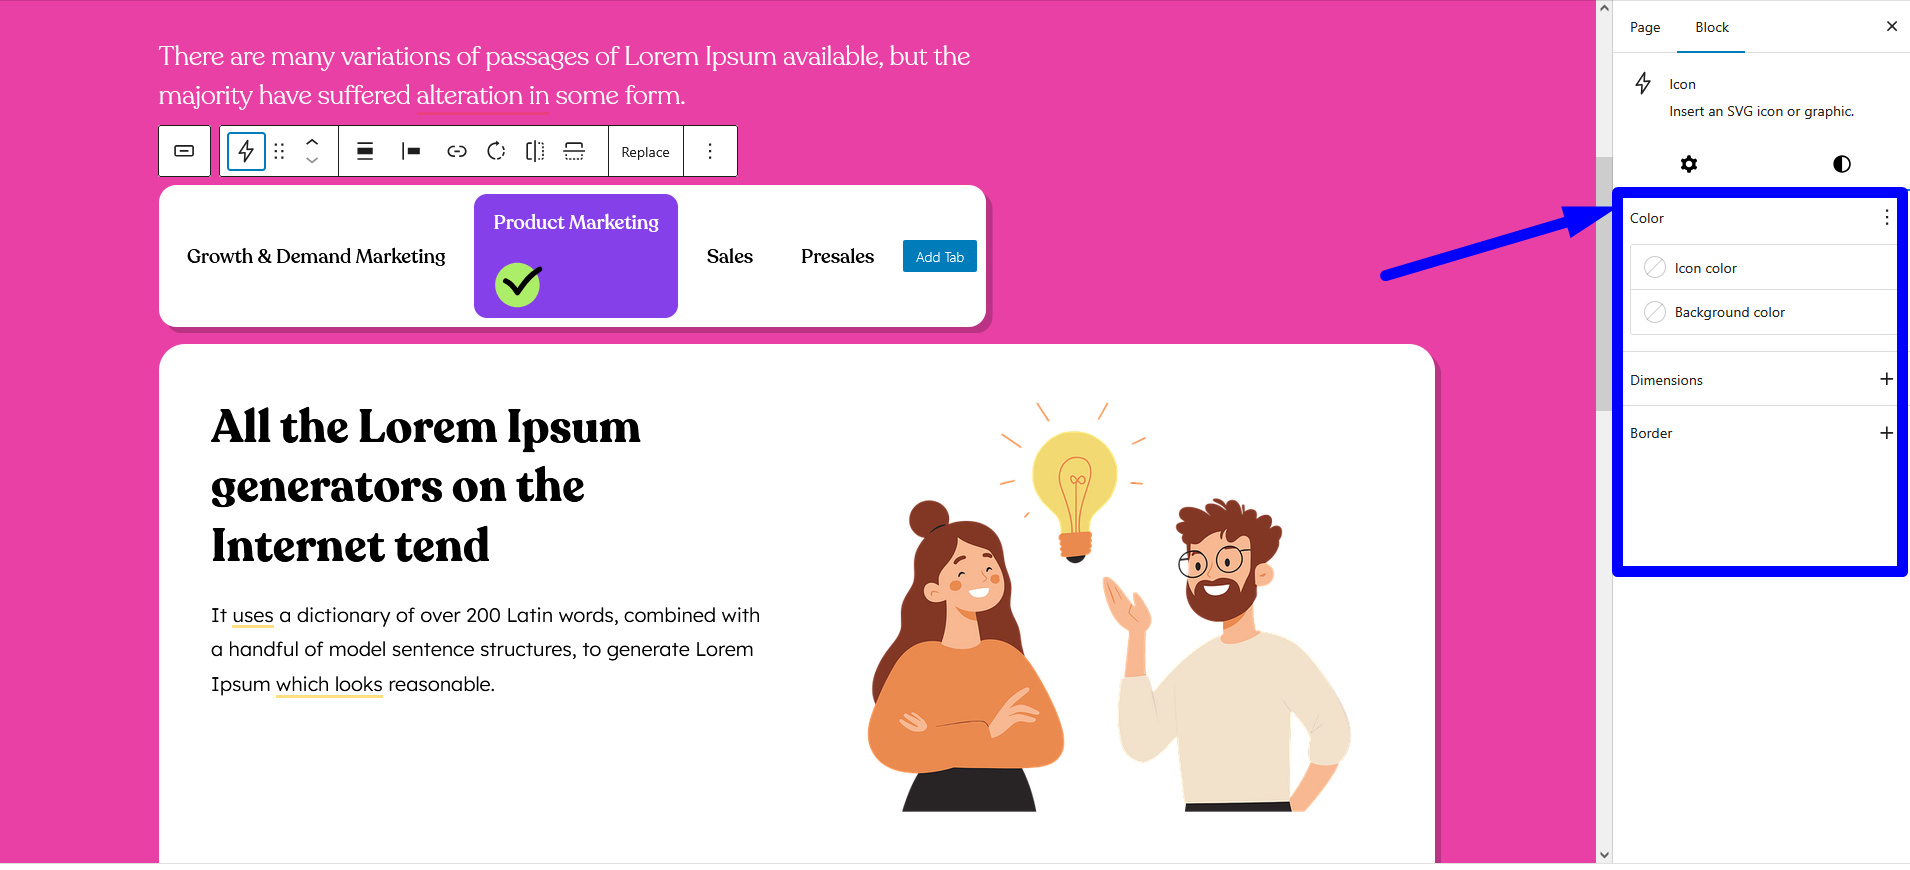
Choose and Customize Your Icon
In the Icon block settings, choose an icon from the available library, such as Font Awesome or SVG options. Then, use the Block Sidebar controls to adjust the icon’s size, color, and alignment to match your design preferences.
Add Tab Text Label
After adding the icon, click to insert a Paragraph or Heading block next to it for your tab label. Then type in your label, such as “Features” or “Pricing,” to clearly describe the tab’s content.
Arrange Icon & Text
To align the icon and text horizontally, use drag-and-drop or flex settings if your theme supports them. Then, fine-tune the layout by adjusting the block’s Padding and Margin controls to achieve clean and balanced spacing.
Click Preview to see how your icons look on desktop and mobile. If you are satisfied, then click Publish or Update to save your changes.
With icons in your tabs, you can create more engaging, user-friendly navigation that guides visitors to key content at a glance!